
You wake up stiff. You sit at a desk for hours. By evening, your neck, hips, and lower back feel like they belong to someone twice your age.
Here’s the good news: 10 daily yoga exercises can undo a surprising amount of that tightness in about 15 minutes. You don’t need a studio, fancy gear, or the ability to touch your toes.
Save this for later: Pin this routine so it’s ready the next time your body feels stiff.
This routine is built for real life. Every pose has simple steps, a hold time, and an easier option. And there’s one common mistake in pose number four that quietly ruins the stretch for most beginners. We’ll get to it.
Why Daily Yoga Works Better Than Occasional Classes
Think about brushing your teeth. Two hours once a week would be pointless. Two minutes every day works.
Flexibility and strength respond the same way. Short, regular sessions teach your body a new normal. Your muscles stop guarding, your joints move more freely, and your breathing slows down.
Quick takeaway: Fifteen gentle minutes every day beats one intense hour once a week.
Daily yoga can help with:
- Stiffness in the hips, hamstrings, shoulders, and spine
- Posture, especially if you work at a desk or look down at your phone a lot
- Stress, because slow breathing signals your body to settle
- Balance and body awareness, which help in every other workout
- Sleep routines, when you finish the day with slower poses
Yoga isn’t a cure for medical conditions. But as a gentle habit, it’s one of the easiest ways to feel better in your body.
Before You Start: 4 Quick Setup Rules
Read these first. They take one minute and make every pose work better.
- Use a non-slip surface. A yoga mat is ideal. A firm rug works too.
- Wear stretchy, comfortable clothes. You should be able to bend freely.
- Warm up with three slow breaths. Breathe in through the nose and out through the nose or mouth.
- Never push into sharp pain. A gentle stretch is fine. Pinching, burning, or numbness is your cue to back off.
If you’re pregnant, recovering from an injury, or managing a health condition, check with your doctor before starting.
The 10 Daily Yoga Exercises
Do them in this order. It moves from standing to the floor and ends with deep rest.
1. Mountain Pose (Tadasana): Reset Your Posture
This looks like simply standing. It isn’t. It’s the foundation for every other pose.
How to do it:
- Stand with your feet hip-width apart and your weight even on both feet.
- Soften your knees slightly and lengthen your spine.
- Roll your shoulders back and let your arms hang with palms facing forward.
- Breathe slowly and imagine a string lifting the crown of your head.
Hold: 5 slow breaths.
Easier option: Stand with your back near a wall to feel where your posture drifts.
Starting here wakes up your body awareness. Next, we’ll warm up the spine.
2. Cat-Cow Stretch: Wake Up Your Spine
If your back feels stiff in the morning, this pose is your best friend.
How to do it:
- Come onto your hands and knees, with wrists under shoulders and knees under hips.
- Inhale: drop your belly, lift your chest, and look slightly forward (Cow).
- Exhale: round your back toward the ceiling and tuck your chin (Cat).
- Move slowly with your breath.
Hold: 8 to 10 rounds.
Easier option: Place a folded towel under your knees if they feel sensitive.
Pin-worthy tip: Let your breath lead the movement, not the other way around.
3. Downward-Facing Dog: Stretch the Entire Back of Your Body
This pose stretches your calves, hamstrings, and shoulders at the same time.
How to do it:
- From hands and knees, tuck your toes and lift your hips up and back.
- Press your hands into the mat and spread your fingers wide.
- Keep a small bend in your knees if your hamstrings feel tight.
- Let your head hang relaxed between your arms.
Hold: 5 breaths.
Easier option: Bend your knees generously and focus on lengthening your spine rather than straightening your legs.
Most beginners chase straight legs. Don’t. A long spine matters far more.
4. Low Lunge (Anjaneyasana): Open Tight Hips
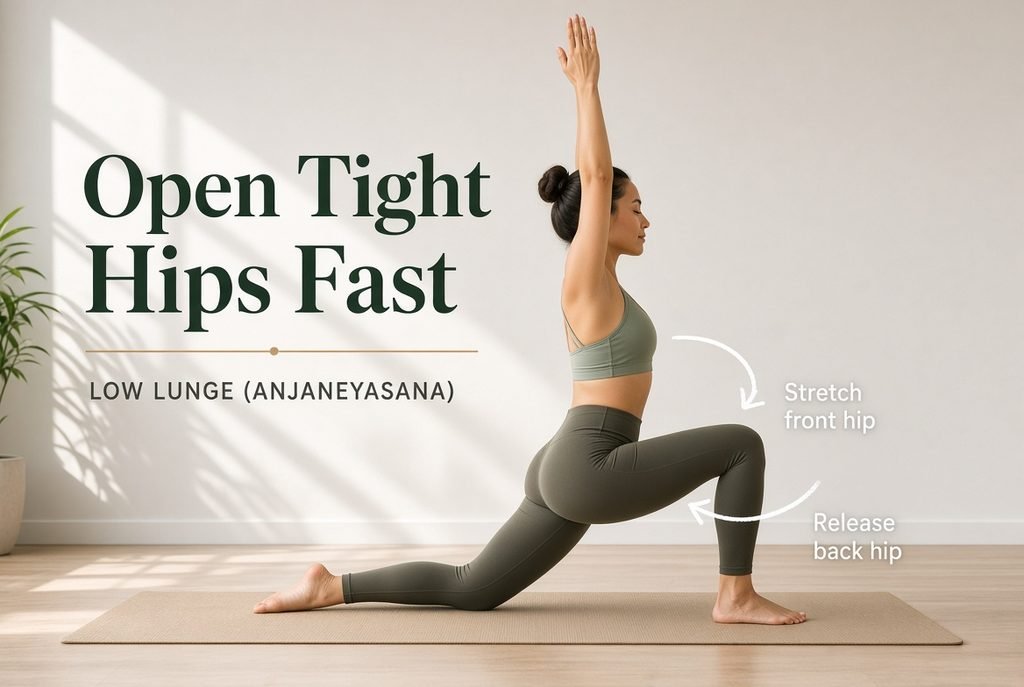
Sitting all day shortens the muscles at the front of your hips. This pose gently lengthens them.
How to do it:
- From Downward Dog, step your right foot between your hands.
- Lower your back knee to the mat.
- Slide your hips forward until you feel a stretch at the front of the back hip.
- Lift your arms overhead if it feels comfortable.
Hold: 5 breaths per side.
The mistake to avoid: Arching your lower back to go deeper. Instead, tuck your tailbone slightly and keep your ribs soft. That one adjustment is what actually opens the hip.
Easier option: Keep your hands on the floor or on blocks.
5. Warrior II: Build Strength and Steadiness
Flexibility without strength can feel unstable. This pose builds both.
How to do it:
- Stand with your feet wide, about a leg’s length apart.
- Turn your right foot out and bend that knee over your ankle.
- Extend your arms out to the sides at shoulder height.
- Gaze over your front fingertips and keep your torso centered.
Hold: 5 breaths per side.
Easier option: Shorten your stance and bend the front knee less.
This is where the routine starts to feel strong. Next comes something calmer.
6. Tree Pose (Vrksasana): Train Your Balance
Balance is a skill, and it fades if you don’t practice it.
How to do it:
- Stand on your left foot and place your right foot on your calf or inner thigh. Avoid pressing it on the knee.
- Bring your palms together at your chest.
- Fix your eyes on one still point in front of you.
- Stay tall and keep breathing.
Hold: 5 breaths per side.
Easier option: Keep your toes on the floor with your heel against your ankle, or rest a hand on a wall.
Quick takeaway: Wobbling means it’s working. Your balance muscles are learning.
7. Bridge Pose: Strengthen Your Back and Open Your Chest
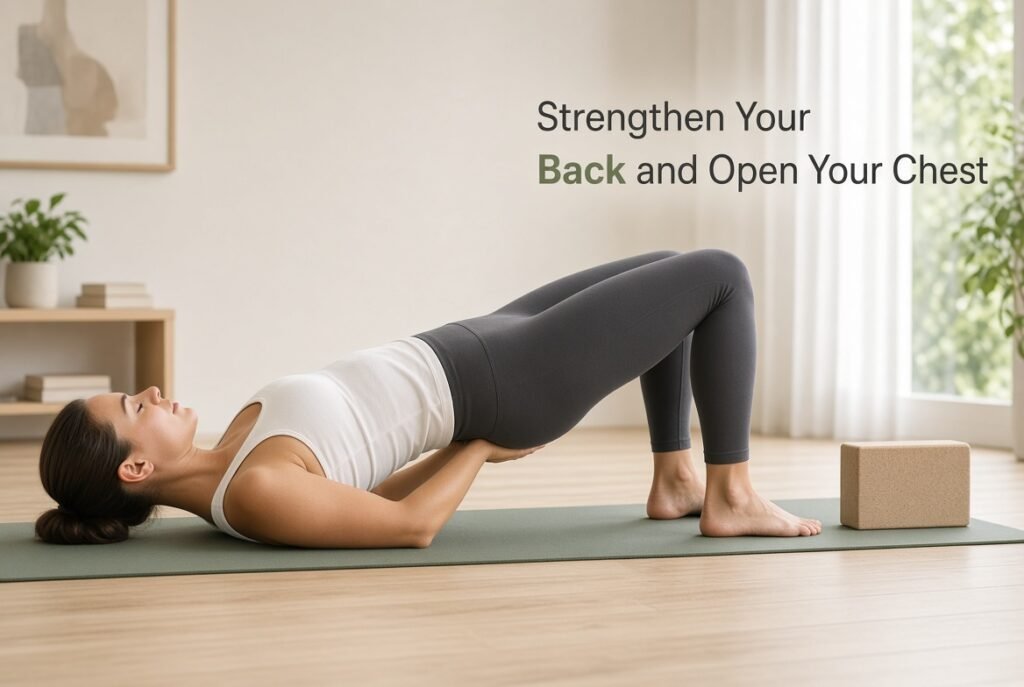
Now we move to the floor. Bridge strengthens the glutes and counters hours of slouching.
How to do it:
- Lie on your back with your knees bent and feet hip-width apart.
- Press into your feet and lift your hips toward the ceiling.
- Keep your knees pointing forward, not falling outward.
- Roll your shoulders under and gently squeeze your glutes.
Hold: 5 breaths, then lower slowly. Repeat twice.
Easier option: Lift only a little, or place a block or folded blanket under your hips for support.
8. Seated Forward Fold: Release Hamstrings and Calm the Mind
This pose looks simple, but it asks you to slow down and let go.
How to do it:
- Sit with your legs stretched forward and your spine tall.
- Inhale and lengthen your torso.
- Exhale and fold forward from your hips, not by rounding your back.
- Rest your hands on your legs, ankles, or feet.
Hold: 8 slow breaths.
Easier option: Bend your knees or sit on a folded blanket to tilt your pelvis forward.
Tight hamstrings are common. Reaching your toes is not the goal. Feeling a steady stretch is.
9. Supine Spinal Twist: Let Your Back Unwind
Twists feel like wringing out a towel. They ease stiffness in the spine and around the hips.
How to do it:
- Lie on your back and hug both knees to your chest.
- Drop your knees to the left and extend your arms out in a T shape.
- Turn your head to the right if your neck feels comfortable.
- Relax your shoulders into the floor.
Hold: 8 breaths per side.
Easier option: Place a pillow between or under your knees.
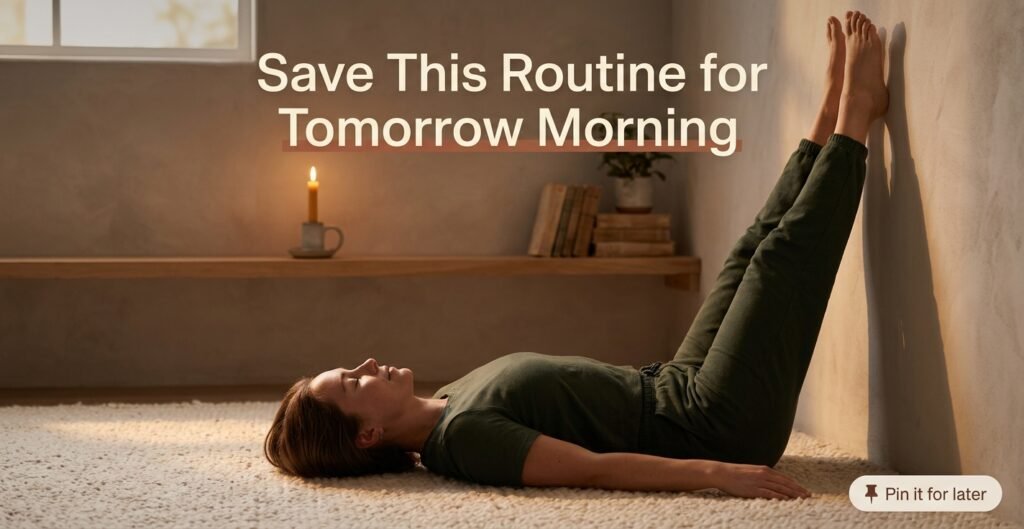
10. Legs-Up-the-Wall: End With Deep Recovery
This is the reward pose. It lets tired legs rest and slows your breathing.
How to do it:
- Sit sideways beside a wall and swing your legs up as you lie back.
- Rest your arms by your sides or on your belly.
- Let your legs relax against the wall.
- Close your eyes and breathe slowly.
Hold: 2 to 5 minutes.
Easier option: Place a cushion under your hips, or lie on the floor with your calves on a chair or sofa.
If this pose bothers you because of a medical issue, rest in Child’s Pose instead.
Your 15-Minute Daily Flow (Quick Cheat Sheet)
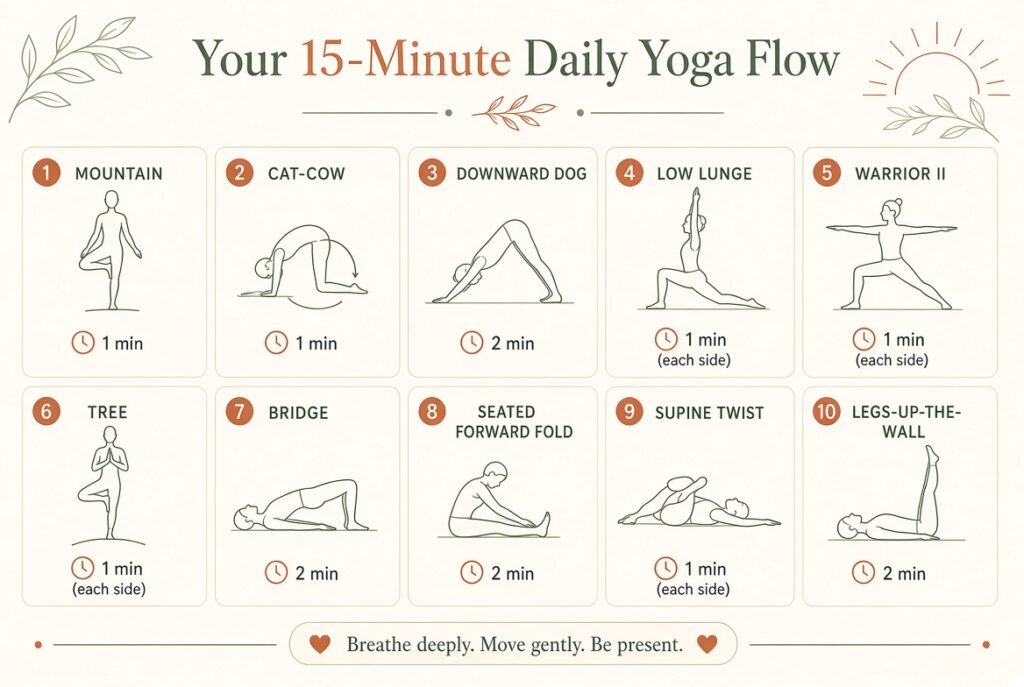
Here’s the whole routine at a glance:
- Mountain Pose: 5 breaths
- Cat-Cow: 8 to 10 rounds
- Downward Dog: 5 breaths
- Low Lunge: 5 breaths per side
- Warrior II: 5 breaths per side
- Tree Pose: 5 breaths per side
- Bridge Pose: 5 breaths, twice
- Seated Forward Fold: 8 breaths
- Supine Twist: 8 breaths per side
- Legs-Up-the-Wall: 2 to 5 minutes
Pin this list. It’s the entire routine on one screen.
5 Common Mistakes That Slow Your Progress
Avoid these and you’ll improve faster:
- Holding your breath. If you can’t breathe smoothly, you’re pushing too hard.
- Forcing the stretch. Muscles open when they feel safe, not when they’re yanked.
- Comparing yourself to photos. Your body has its own shape and range.
- Skipping the easier options. Modifications are smart, not weak.
- Doing it only when you feel like it. Habits beat motivation every time.
How to Make Daily Yoga Actually Stick
Knowing the poses is the easy part. Showing up is harder. Here’s a simple way to build the habit.
Days 1 to 3: Do only poses 1 to 5. Keep it under 8 minutes.
Days 4 to 7: Add poses 6 to 8.
Week 2 onward: Do the full flow.
Other small tricks that help:
- Unroll your mat the night before so it’s waiting for you.
- Attach yoga to something you already do, like right after brushing your teeth.
- Track your streak on a calendar.
- On busy days, do just three poses. Something always beats nothing.
Best Time of Day for Your Daily Yoga
There’s no single perfect time. Choose the one you’ll actually keep.
- Morning: wakes up the body and sets a calm tone.
- Midday: a good reset when you’ve been sitting for hours.
- Evening: helps you unwind. Slow down the flow and spend longer on the last three poses.
FAQ: 10 Daily Yoga Exercises
Is it safe to do yoga every day?
For most healthy adults, gentle daily yoga is fine. Listen to your body, rest when you’re sore, and ask a doctor if you have injuries or health concerns.
How long should I hold each pose?
Most poses here work well at 5 to 8 slow breaths. Hold longer for restful poses like Legs-Up-the-Wall.
How long before I notice results?
Many people feel looser after the first few sessions. Changes in flexibility and posture usually build over several weeks of regular practice. Everyone’s pace is different.
Do I need a yoga mat?
A mat helps with grip and comfort, but a firm rug or carpet works while you’re starting out.
Can beginners do these 10 daily yoga exercises?
Yes. Each pose includes an easier option, so you can start gently and progress at your own pace.
Can I lose weight with this routine?
This routine is mainly for flexibility, strength, and relaxation. It can support a healthy lifestyle, but it isn’t a substitute for a balanced diet and other exercise.
Final Thoughts: Small Practice, Big Change
You don’t need an hour or perfect flexibility. You need a mat, a few quiet minutes, and the willingness to keep showing up.
These 10 daily yoga exercises give you a complete reset for your spine, hips, legs, and mind. Start with the first five poses tomorrow morning, and add the rest as it gets easier.
Save this guide, share it with a friend who sits all day, and explore more beginner-friendly routines in our Yoga & Flexibility section.
Pingback: 10 Self-Care Ideas That Actually Calm Your Mind (Even on Your Busiest Days) -